立创天空星GD32开发板 开源嵌入式组件移植测试ZorbFramework移植
立创开发板 开源嵌入式组件移植测试 02-嵌入式框架Zorb Framework移植
Zorb Framework
Zorb Framework是一个轻量级的嵌入式框架,搭建目的是为在不能运行Linux的芯片上快速开发应用,不用反复造轮子。
Zorb Framework的初步设计功能有
1、时间系统功能zf_time
2、环形缓冲区功能zf_buffer
3、列表功能zf_list
4、状态机功能zf_fsm
5、事件功能zf_event
6、定时器功能zf_timer
7、任务功能zf_task
前6个功能,就可以实现纯事件驱动的程序,基本可以满足中小型嵌入式应用程序开发的需求。加上任务功能,是为了满足部分程序对实时性要求较高的需求。当然,也可以将前6个功能裁剪出来,然后运行在现有的嵌入式系统上面,这样子也可以满足实时性的需求。
一、移植前的准备
1. 准备目标硬件(开发板/芯片/模组)
Zorb Framework支持ARM Cortex M3/M4的内核的芯片的移植。本教程将使用立创开发板GD32F407进行示例移植,其他 ARM Cortex M3/M4系列开发板和芯片移植方法类似。
调试ARM Cortex M核还需要仿真器,如果您的开发板或者芯片模组没有板载仿真器,就需要连接外置的仿真器,如J-Link、DAPLink之类的。
2.准备编译器环境
本移植指南针对的是Keil编译器,所以我们移植内核前需要先安装Keil编译器,能编译ARM Cortex M核的Keil编译器现在也叫MDK。
下载地址为:https://www.keil.com/demo/eval/arm.htm
3. 准备芯片对应的裸机工程
移植Zorb Framework基础内核需要您提前准备一个芯片对应的裸机工程,裸机工程包含基本的芯片启动文件、基础配置(时钟、主频等)、以及串口1和systick,其中串口1提供调试打印功能,systick提供系统时间计数功能。

4. 准备Zorb Framework的源码
Zorb Framework的源码已经开源,github仓库地址 https://github.com/54zorb/Zorb-Framework)
| 一级目录 | 说明 |
|---|---|
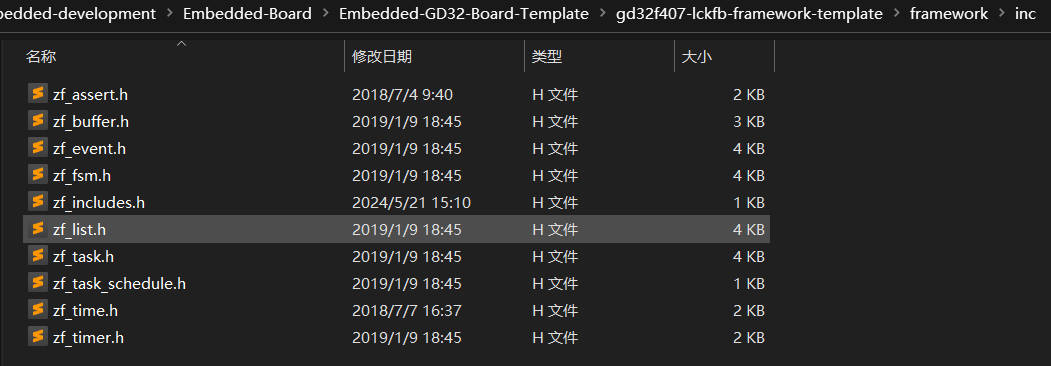
| inc | Zorb Framework 头文件 |
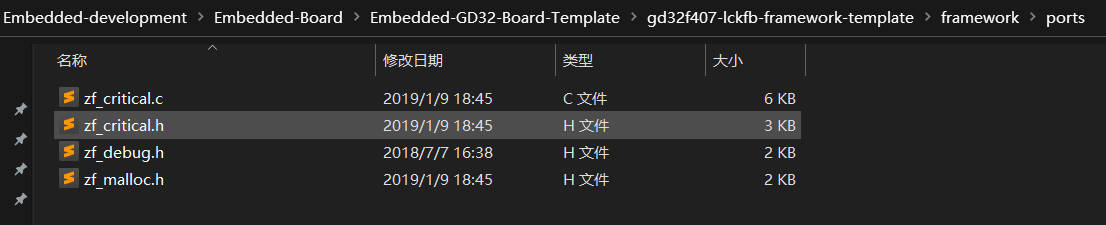
| ports | Zorb Framework 接口文件 支持ARM Cortex M3/M4的内核 |
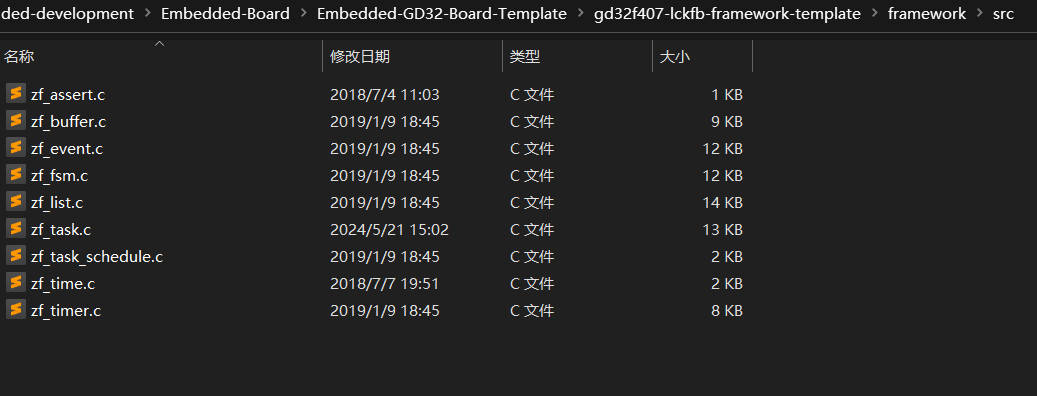
| src | Zorb Framework 源代码文件 |
二、移植
打开keil工程,开始添加Zorb Framework的内核代码。
1. 添加Zorb Framework源代码文件
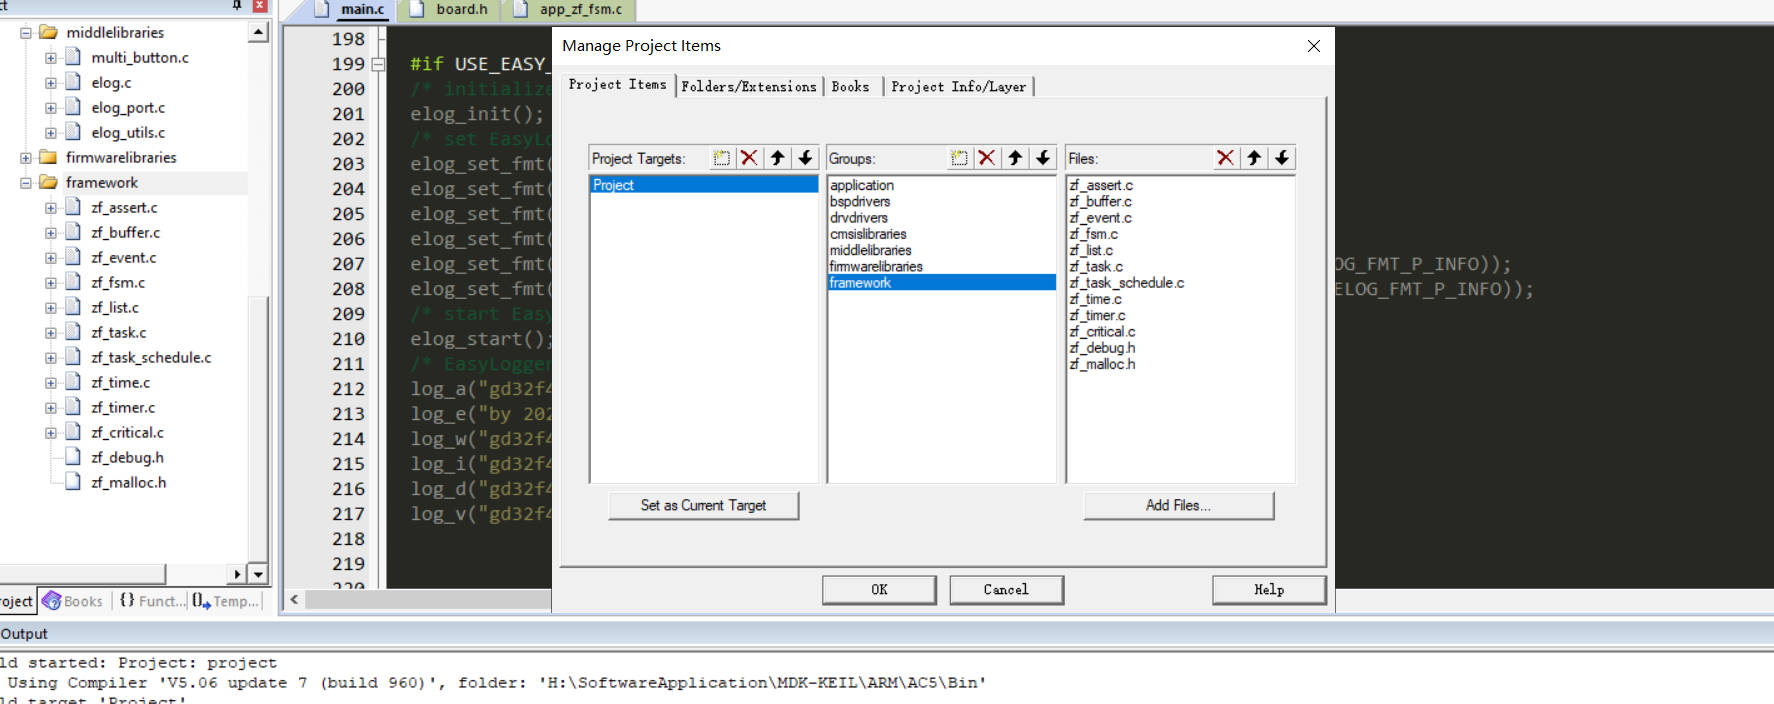
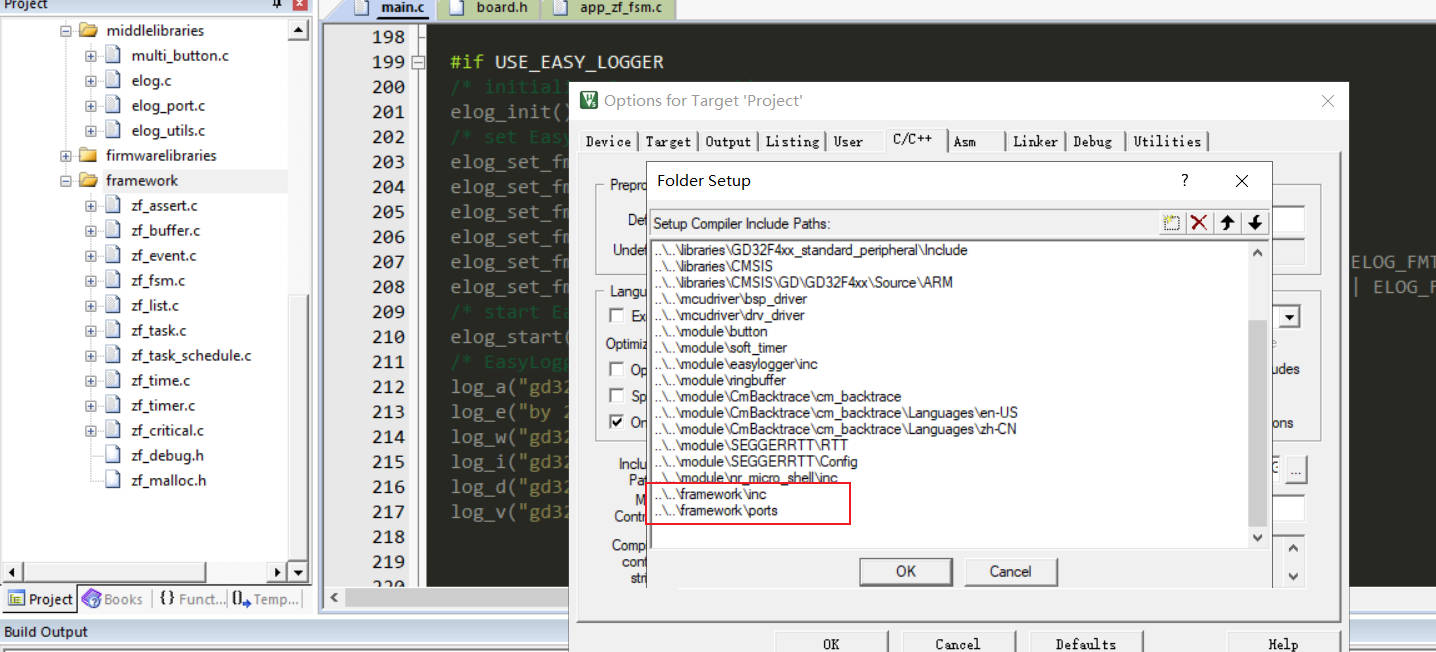
2. 添加Zorb Framework头文件目录
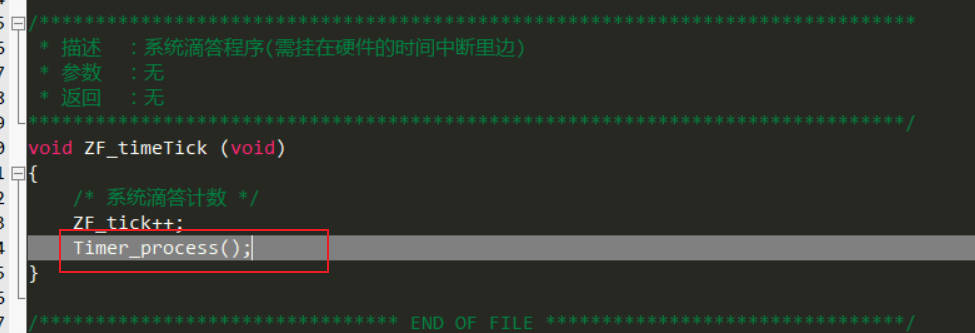
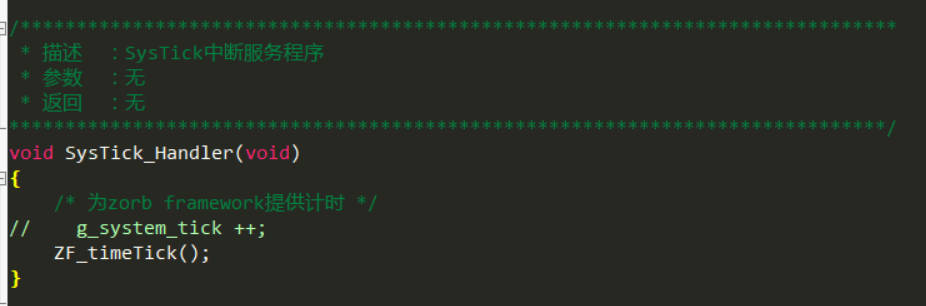
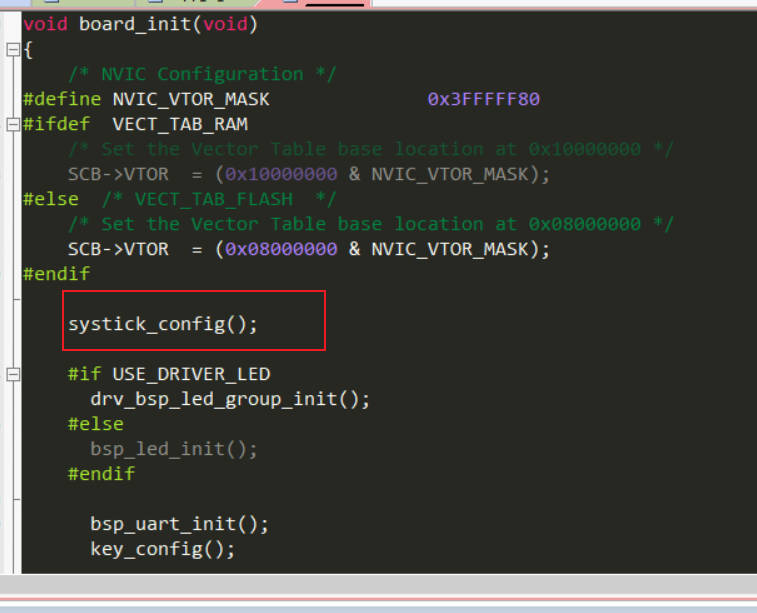
3. 系统滴答计数器 中断相关配置
- 配置SysTick_Handler
- 配置systick_config
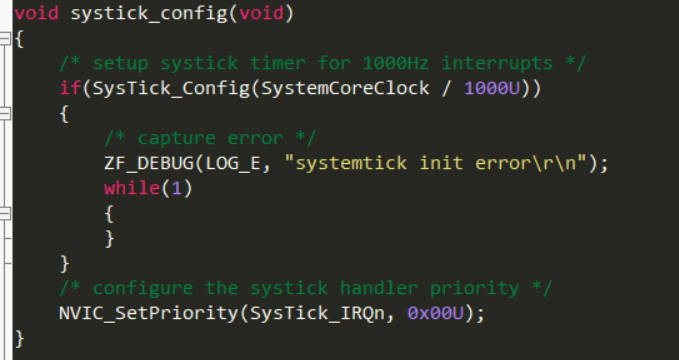
- 初始化systick_config 初始化系统时基
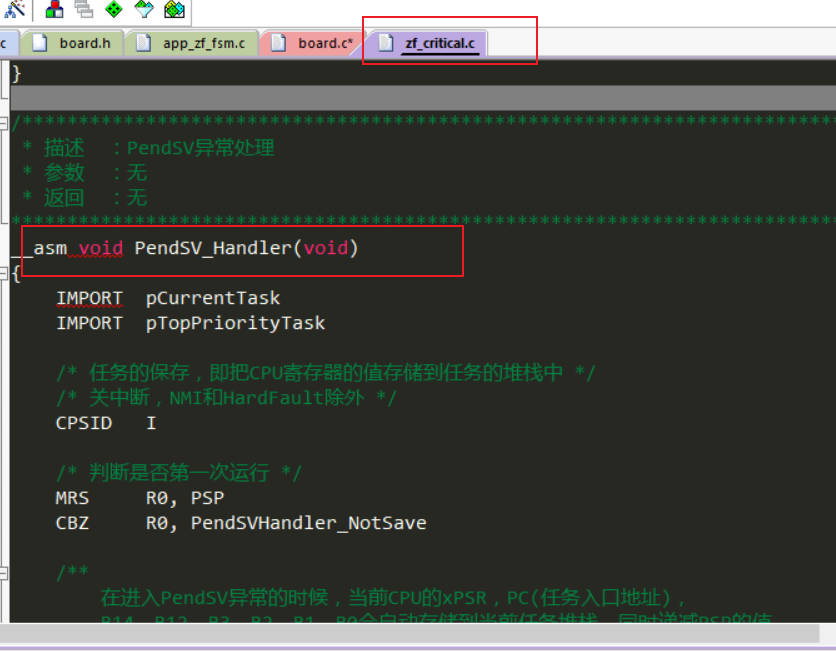
注释PendSV_Handler
Zorb Framework提供的任务功能比较简单,状态也只有运行和关闭两种状态。任务功能实现的关键在于任务调度,而任务调度的核心又在于任务堆栈的保存和恢复。这部分需要根据使用的芯片进行修改,在GD32中,通过触发PendSV异常进行任务切换:
Zorb Framework重写了endSV_Handler

这样Zorb Framework源码就全部添加完毕了。
三、测试移植结果
1. 添加app_test测试代码
2. 编写测试代码
/*
* 立创开发板GD32F407VET6
* Change Logs:
* Date Author Notes
* 2024-5-21 Coderend first version
*/
#include "board.h"
#include "zf_includes.h"
#define LOG_TAG "main"
/*
MAIN_Function
*/
int main(void)
{
/* initialize board */
board_init();
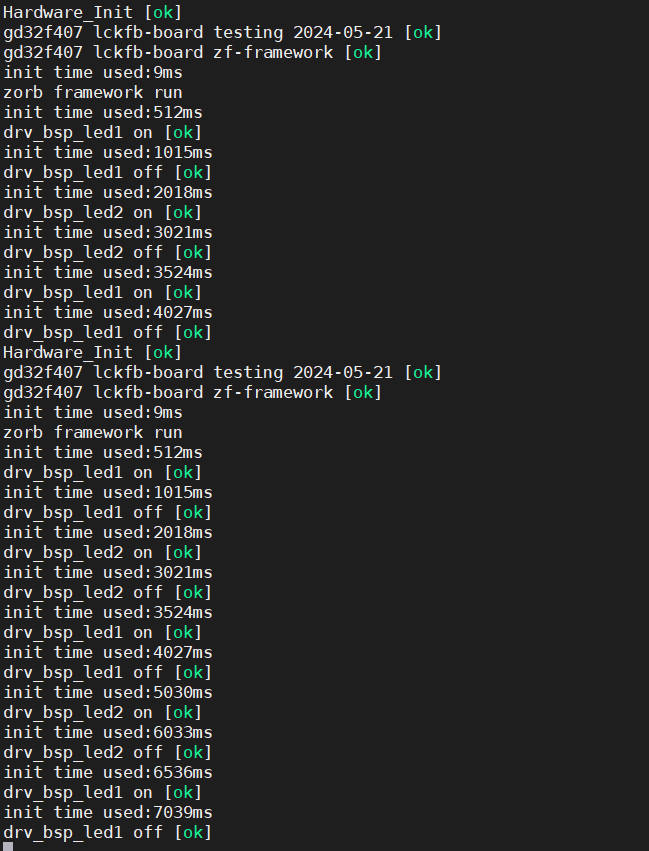
ZF_DEBUG(LOG_D,"Hardware_Init [ok] \r\n");
ZF_DEBUG(LOG_D,"gd32f407 lckfb-board testing 2024-05-21 [ok]\r\n");
ZF_DEBUG(LOG_D,"gd32f407 lckfb-board zf-framework [ok]\r\n");
ZF_DEBUG(LOG_D, "init time used:%dms\r\n", ZF_SYSTIME_MS());
ZF_DEBUG(LOG_D, "zorb framework run\r\n");
//测试 app_test 需要打开main.h 中的宏定义
#if USE_APP_BUFFER
App_Buffer_init();
App_Buffer_process();
#endif
#if USE_APP_LIST
App_List_init();
App_List_process();
#endif
#if USE_APP_FSM
App_Fsm_init();
App_Fsm_process();
#endif
#if USE_APP_EVENT
App_Event_init();
App_Event_process();
#endif
#if USE_APP_TIMER
App_Timer_init();
App_Timer_process();
#endif
#if USE_APP_TASK
App_Task_init();
#endif
while (1)
{
#if 0
drv_bsp_led_on(&LED_1);
ZF_DELAY_MS(500);
ZF_DEBUG(LOG_D, "init time used:%dms\r\n", ZF_SYSTIME_MS());
ZF_DEBUG(LOG_D, "drv_bsp_led1 on [ok]\r\n");
drv_bsp_led_off(&LED_1);
ZF_DELAY_MS(500);
ZF_DEBUG(LOG_D, "init time used:%dms\r\n", ZF_SYSTIME_MS());
ZF_DEBUG(LOG_D, "drv_bsp_led1 off [ok]\r\n");
drv_bsp_led_on(&LED_2);
ZF_DELAY_MS(1000);
ZF_DEBUG(LOG_D, "init time used:%dms\r\n", ZF_SYSTIME_MS());
ZF_DEBUG(LOG_D, "drv_bsp_led2 on [ok]\r\n");
drv_bsp_led_off(&LED_2);
ZF_DELAY_MS(1000);
ZF_DEBUG(LOG_D, "init time used:%dms\r\n", ZF_SYSTIME_MS());
ZF_DEBUG(LOG_D, "drv_bsp_led2 off [ok]\r\n");
#endif
}
}
/*
* 立创开发板GD32F407VET6
* Change Logs:
* Date Author Notes
* 2024-4-11 Coderend first version
*/
#ifndef __BOARD_H__
#define __BOARD_H__
//--------------------------------------------------------------------------------------------------
// 驱动库宏定义 | 0 | 1 | 2 | 3 | 4 | 5 | 6 | 7 | 8 | 9
//--------------------------------------------------------------------------------------------------
#define USE_DRIVER_LED 1
#define USE_CM_BACKTRACE 0
#define USE_EASY_LOGGER 0
#define USE_SEGGER_RTT 0
#define USE_MULTI_BUTTON 0
#define USE_SOFT_TIMER 0
//--------------------------------------------------------------------------------------------------
// C库函数调用头文件 | 0 | 1 | 2 | 3 | 4 | 5 | 6 | 7 | 8 | 9
//--------------------------------------------------------------------------------------------------
#include <stdint.h>
#include <stdbool.h>
#include <string.h>
#include <stdarg.h>
#include <stdlib.h>
#include <stdio.h>
#include <math.h>
//--------------------------------------------------------------------------------------------------
// 数据类型重定义 | 0 | 1 | 2 | 3 | 4 | 5 | 6 | 7 | 8 | 9
//--------------------------------------------------------------------------------------------------
/**************************************************************************************************
typedef unsigned char uint8_t;
typedef unsigned short uint16_t;
typedef unsigned long uint32_t;
typedef unsigned long long int uint64_t;
typedef signed char int8_t;
typedef signed short int16_t;
typedef signed long int32_t;
typedef long long int int64_t;
C语言数据类型
整型(int)、单精度浮点型(float)
双精度浮点型(double)、字符型(char)
整型(int)类型又划分了
long int(也可以直接写为long) 、long long int(可以直接写为long long) 、short int(可以直接写为short)
指针类型:void *;
空类型:void;
构造类型:数组、结构体(strtuct)、共用体类型(union)、枚举类型(enum);
1字节(Byte) = 8位(bit) 1Byte=8bi
******************************************************************************************************/
//--------------------------------------------------------------------------------------------------
// GD32_STD库文件 | 0 | 1 | 2 | 3 | 4 | 5 | 6 | 7 | 8 | 9
//--------------------------------------------------------------------------------------------------
#include "gd32f4xx.h"
#include "gd32f4xx_libopt.h"
#include "gd32f4xx_exti.h"
//--------------------------------------------------------------------------------------------------
// 中间件驱动文件 | 0 | 1 | 2 | 3 | 4 | 5 | 6 | 7 | 8 | 9
//--------------------------------------------------------------------------------------------------
#include "elog.h"
#include "multi_button.h"
//--------------------------------------------------------------------------------------------------
// Drv_Drivers文件 | 0 | 1 | 2 | 3 | 4 | 5 | 6 | 7 | 8 | 9
//--------------------------------------------------------------------------------------------------
#include "driver_public.h"
#include "driver_gpio.h"
//--------------------------------------------------------------------------------------------------
// BSP_Drivers文件 | 0 | 1 | 2 | 3 | 4 | 5 | 6 | 7 | 8 | 9
//--------------------------------------------------------------------------------------------------
#include "bsp_uart.h"
#include "bsp_led.h"
//--------------------------------------------------------------------------------------------------
// 板载模块 | 0 | 1 | 2 | 3 | 4 | 5 | 6 | 7 | 8 | 9
//--------------------------------------------------------------------------------------------------
/* 定义key的引脚 */
#define BSP_KEY_RCU RCU_GPIOA
#define BSP_KEY_PORT GPIOA
#define BSP_KEY_PIN GPIO_PIN_0
#define NULL 0
#define ARRAYNUM(arr_nanme) (uint32_t)(sizeof(arr_nanme) / sizeof(*(arr_nanme)))
#define TRANSMIT_SIZE (ARRAYNUM(txbuffer) - 1)
//--------------------------------------------------------------------------------------------------
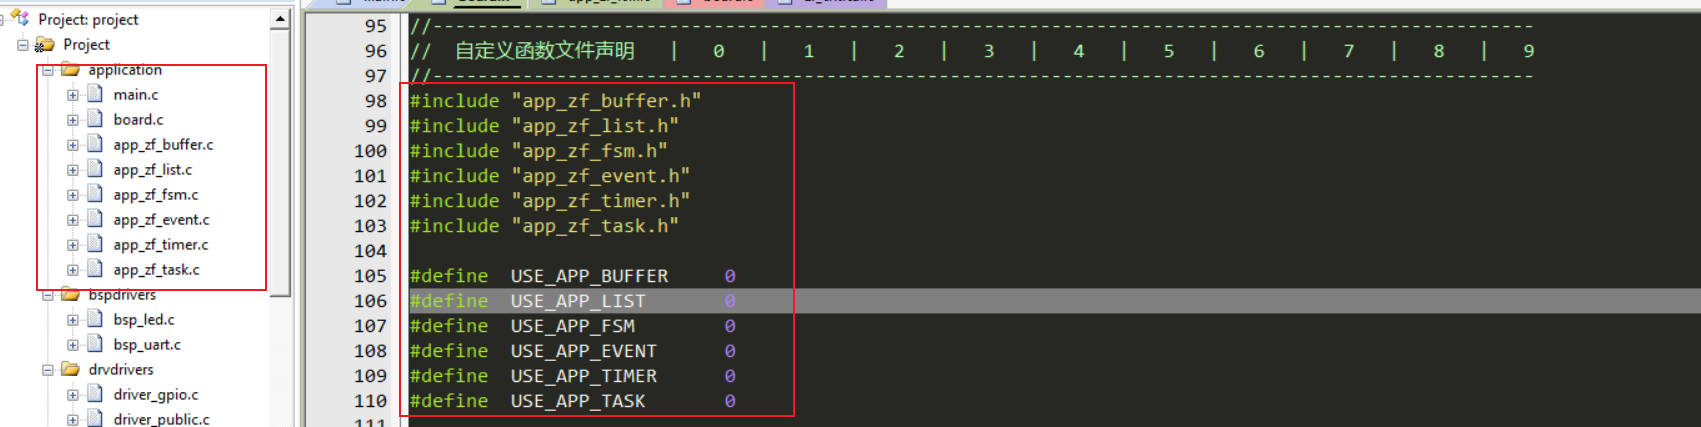
// 自定义函数文件声明 | 0 | 1 | 2 | 3 | 4 | 5 | 6 | 7 | 8 | 9
//--------------------------------------------------------------------------------------------------
#include "app_zf_buffer.h"
#include "app_zf_list.h"
#include "app_zf_fsm.h"
#include "app_zf_event.h"
#include "app_zf_timer.h"
#include "app_zf_task.h"
#define USE_APP_BUFFER 0
#define USE_APP_LIST 0
#define USE_APP_FSM 0
#define USE_APP_EVENT 0
#define USE_APP_TIMER 0
#define USE_APP_TASK 0
void board_init(void);
uint32_t get_system_tick(void);
void delay_us(uint32_t _us);
void delay_ms(uint32_t _ms);
#endif
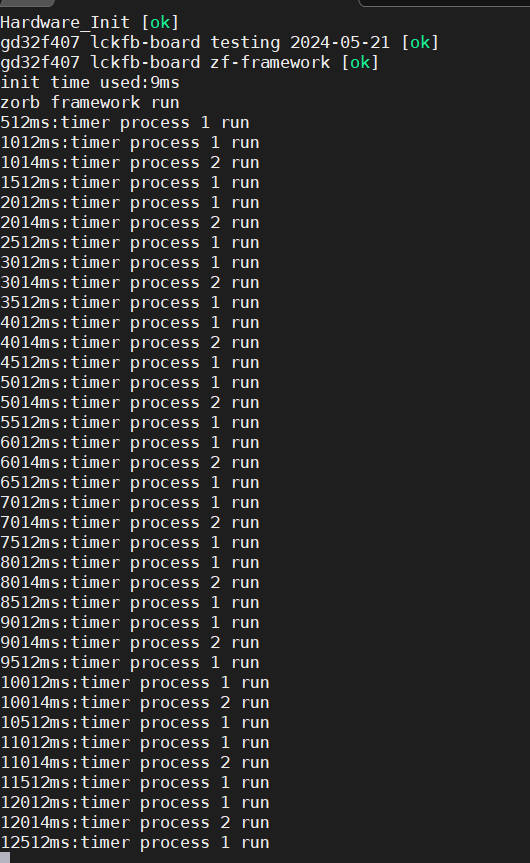
3. 编译下载观察效果
测试时基释放正常输出(ZF_DEBUG,ZF_TIME)
将while(1) 循环中的 #if 0 修改 #if 1
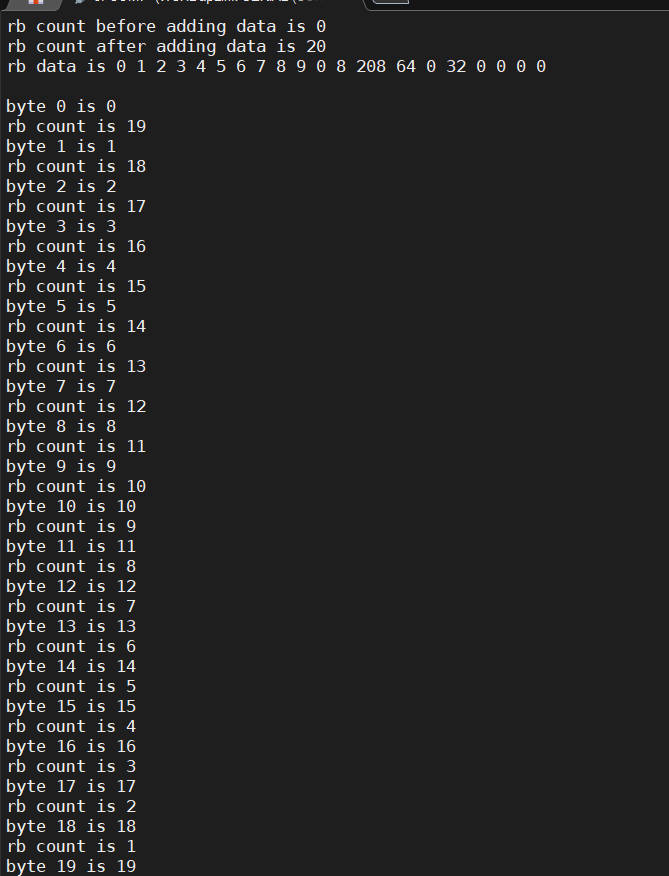
测试zf_buffer
#define USE_APP_BUFFER 1
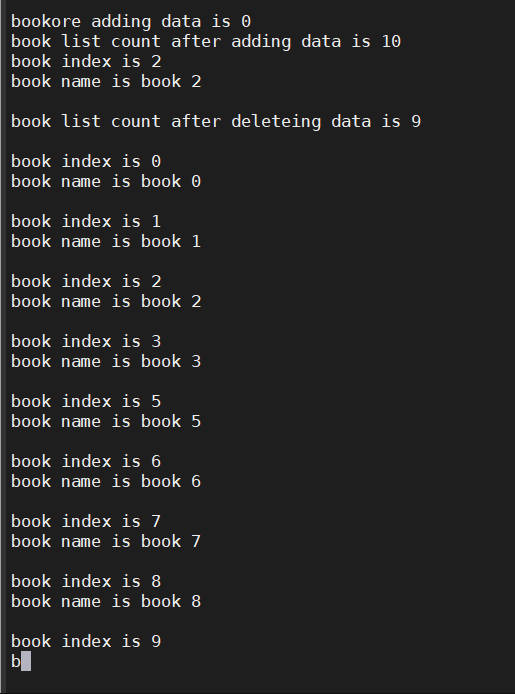
测试zf_list
#define USE_APP_LIST 1
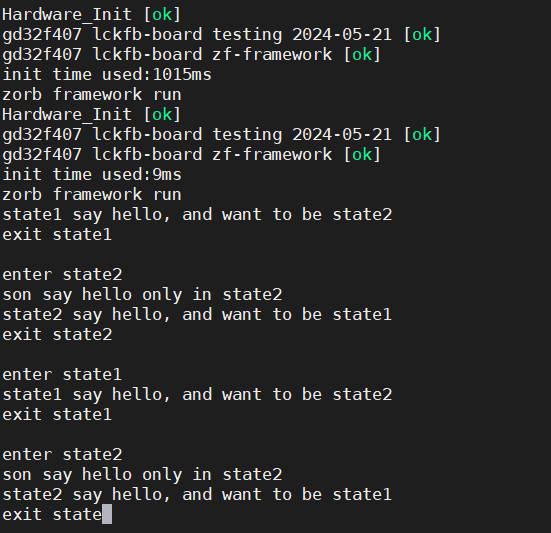
测试zf_fsm
#define USE_APP_FSM 1
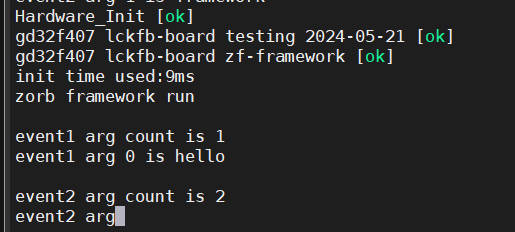
测试zf_event
#define USE_APP_EVENT 1
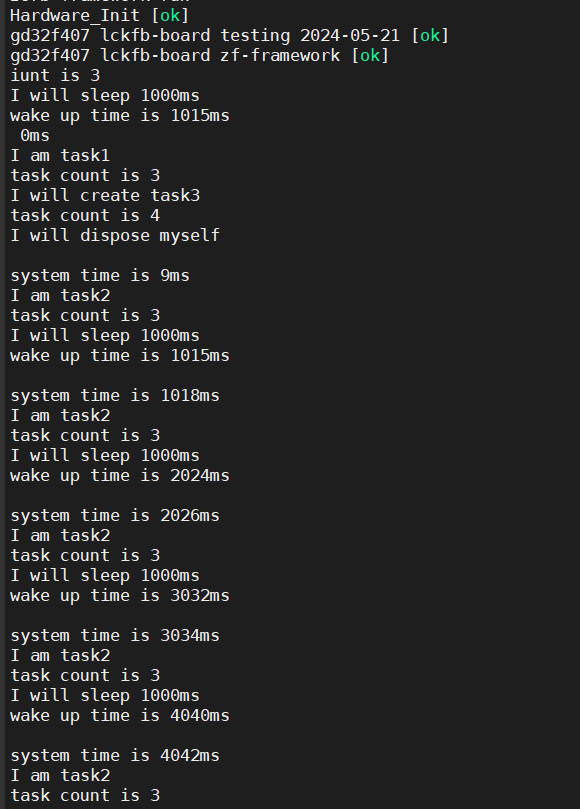
测试zf_task
#define USE_APP_TASK 1
测试zf_timer
#define USE_APP_TIMER 1
事件和事件处理器已经设计好了,再把定时器的处理程序添加到系统滴答程序中即可: